


Devices screen allows the administrator to
-
Manage the details of TR hardware device
-
Configure the hardware Device
-
Fetch data from the hardware time registration device and import it into Attend HRM
-
Schedule the import of data from the device to Attend HRM.
Attend HRM can handle more than one hardware devices at a time. Attend HRM can fetch the time attendance data from one or more hardware devices. All the devices has to be enrolled into Attend HRM.
Overview Screen:Lists the enrolled devices
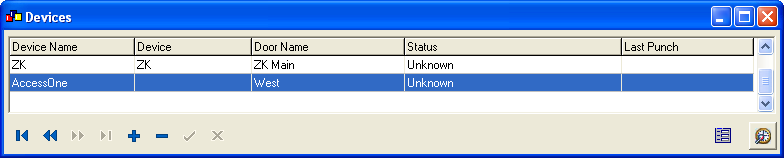
Detail Screen: Displays the details of selected device.
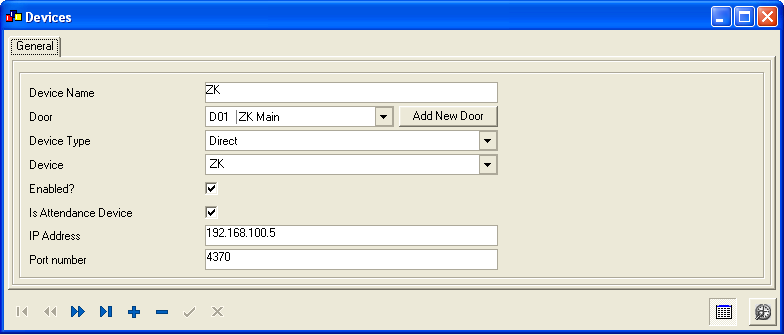
The screen has the following information
| Device Name | Enter a name for the device |
| Door | Add a door where the device is connected |
| Device Type | Select whether the device is direct or mapped. Select direct if u already know the device and parameters required to connect to, else select mapping if the data from the device is extracted and stored in any text file. |
| Device | Select the make of the device |
| Enabled? | Whether device is enabled and working or not |
| Is Attendance Device | Whether device records attendance data or not |
| IP Address | IP Address of device |
| Portnumber | This is generated automatically |
Based on the device make selected, the screen prompts you for different parameters to connect to device.
Now let's see how to map a device.
When the device data is downloaded and stored as a text file, select the device type as mapping as shown below.
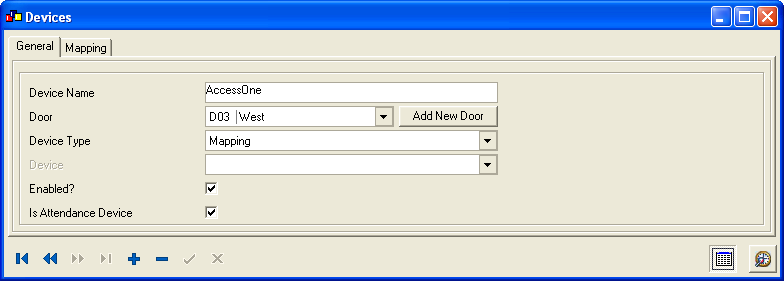
When the device type is selected as mapping, the mapping tab gets enabled.
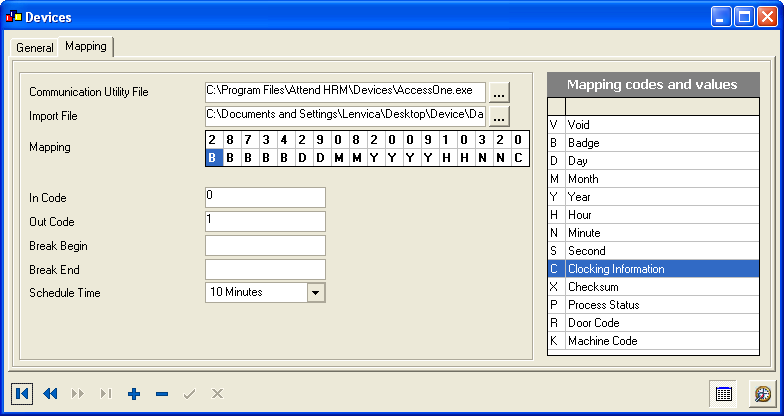
The screen has following information
| Communication Utility File | It is the exe file that downloads the attendance data from device |
| Import File | It is the file into which the data is downloaded |
| Mapping | The data in text file will be as seen in the first row of mapping. Mapping is the process where user denotes what each letter in the text file stands for. The mapping codes assigned in the second row denotes what each letter stands for. |
| In Code | Define in code |
| Out Code | Define the out code |
| Break Begin | Define the break begin code |
| Break End | Define the break end code |
| Scheduled Time | Select time intervals between successive data imports |
Once the mapping is done the utility file will import data into the database at the scheduled interval of time.
Note: * Remember if you have a hardware time registration device that does not have a tool to extract the data, you can always contact the technical support team of Lenvica.
Copyright (c) 2003-2008 Lenvica Computer Solutions